Ordinary life is extraordinary...you just have to know what you are looking for
Showing posts with label recipe. Show all posts

Monday, October 1, 2012

Sour Cream Banana Bread

My baby boy loves banana bread....but only if it's in the shape of a loaf (or so I thought).  Apparently a regular loaf pan-made banana bread is COMPLETELY different than the same banana bread recipe in a muffin tin.  It also does not make the grade in these cute mini-loaf pans.  So sorry.  What was I thinking?  No need to cry, now.... So for now, three of our happy family are, well, happy.  And one is longing for the days when banana bread came in it's originally presented format.  

Mashed banana, anyone?
Swirly batter.....
The key to this super moist, yummy recipe is sour cream...oooohhhh, aahhhhhh!
Cute mini pans, right?
They look "loafy" to me...
Loafly....I mean..lovely!
I loave taking pics of my loaves....
Yum.
Double yum! 
One of my cousins was staying with us for a few days and I thought I'd get up early and make a delicious banana loaf - hopefully drawing everyone out of bed to the wonderful scent coming from the kitchen.  My recipe box was hidden somewhere in the back of the pantry way behind all kinds of things that would have made a racket if touched, and that wasn't exactly the kind of wake up call I was going for so I desperately leafed through a couple of handy cook books I had access to and found this one.  We've never gone back.  It's from the "Breast Wishes from Breast Friends - Women working together for a cure" cook book and is now my new favourite one to make.

Sour Cream Banana Bread


  • 1/2 cup butter
  • 1 cup sugar (I use organic coconut palm sugar, and about 3/4 cup instead of a full cup)
  • 2 eggs
  • 1 tsp Real Vanilla Extract
  • 1 1/2 cup flour (I use Organic Whole Wheat flour)
  • 1 tsp Baking Soda
  • 1/2 tsp Sea Salt
  • 1 cup Bananas, mashed
  • 1/2 cup Nuts, chopped (I don't add these as my family prefers it without plus the nut-free version can be taken to our nut-free school)
  • 1/2 Sour Cream (I have sometimes used Plain Yogurt)
  1. Preheat oven to 350 degrees F
  2. Cream butter with sugar
  3. Beat in eggs and vanilla
  4. In separate bowl, combine flour, baking soda, and salt
  5. Add dry ingredients to wet mixture and mix 
  6. Mix in bananas, nuts (if you are using them), and sour cream, 
  7. Pour into a greased loaf pan
  8. Bake for 1 hour
  9. Enjoy!
xo

Jen

Thursday, September 27, 2012

Easy Peasy Pasta Sauce - Two Ways


Please put up your hand if you have heard the following around your dinner table:

"What's the green stuff?"

"Why is it lumpy?"

"What's in this?"

"What is THAT?"

"Is this all there is for dinner?"

"It looks weird!"

"It smells weird!"

"It tastes weird!"

"I don't like it" (before they've even tried it)

....shall I go on?

"What are the black specks?"

"Why is it touching my meat"

"I don't like tomato sauce, don't we have any ketchup?"

"I'm not hungry anymore....what are we having for dessert?"

"EWWWWW!"

I've got the sweats just thinking about it.  We've all been there.  You find a recipe you know your family will like, you make a trip to the market to lovingly hand pick all the ingredients, sweep your hair into a pony-tail, put on an apron and get cracking in the kitchen until your back is sore and you've burned your hand twice...BUT...you call your be-loveds to the table in a sing-song-y voice and as you are gracefully carrying out your masterpiece with an excited and anticipatory smile you hear it...."I am NOT eating that!!!"  When this happens I imagine myself as a balloon that is flying around the room as the air is rushing out and making that noise...you know the one.

It's tough to take.  I would say that we eat pretty simply....I don't prepare exotic, gourmet meals that only someone with a truly refined palate could appreciate.  I believe fresh is best and a well balanced diet are pretty key in keeping us healthy and energized but that's about it.  However, there are times I have to take my cook hat off and slip into my salesman role, and failing that, I sometimes break out the fake nose and moustache disguise, put on a black body suit and dark glasses (not literally of course, that would be weird) and go into sneaky mode.... my sister calls this being "Sneaky-McSneakerson".  I'd have a T-shirt made but then I suppose that would defeat the point.  Oh well.  The following is a quick pasta sauce that I made but ate two ways.  One - the straight up way served with whole wheat, cheese filled tortellini, and two - pureed in my Vitamix blender and tossed with a whole wheat fusili pasta.  Same exact ingredients, but my boys seem to prefer it "blended", if you will - after all, they "don't like zucchini, onion and garlic".  (Cue music from Mission Impossible)  Sneaky-McSneakerson strikes again!

Straight Up!
Blended...
For me and Ryan...
For the boys...
Easy-Peasy Pasta Sauce


  • 10 - 12 Roma Tomatoes, chopped
  • 1-28oz Can Whole Tomatoes 
  • 1 Large Onion, chopped
  • 1-2 cloves Garlic, thinly sliced
  • 2 ribs Celery, chopped
  • 1-2 Yellow Zucchini, chopped
  • 1 Red Bell Pepper, seeded and chopped
  • 1 Handful fresh Basil Leaves, chopped
  • Sea Salt
  • Fresh Ground Black Pepper
  • 2 Tbsp Butter
  1. In a large sauce pan, melt butter over med heat
  2. Add chopped onion and celery, cook until the onions soften and begin to look translucent in colour, approx 6 - 7 min
  3. Add sliced garlic and cook for additional minute
  4. Stir in chopped tomatoes, can of whole tomatoes in their juice, zucchini, bell pepper, chopped basil leaves and a sprinkle of salt and pepper
  5. Bring mixture to a boil and turn heat down to a simmer
  6. Simmer, stirring and tasting often until sauce begins to thicken a bit and flavours are well blended
  7. Season with salt and pepper
  8. Serve over your favourite pasta straight up, or puree in a blender first and then toss with pasta
*the pureed sauce freezes well in ice cube trays for an easy individual portion - this is great to have on hand when sending noodles in a thermos for lunch


Enjoy!

xo

Jen

Friday, September 21, 2012

Breakfast Smoothie


"Mom"..

"Mom"...

"Mom"...

"Yes?"

"Can we have a smoothie?"

Everyday it's the same question...and I am eternally grateful.  How else would I get a 6 and 8 year old to eat spinach before 8am?  (or 12pm..or 4pm..or 5:54pm).

So simple, so delicious, so healthy....this makes a momma happy!


My beloved Vitamix!  You have given me so much....  xoxoxoxoxo

Notice the loooonnnngg shadow of the early morning?  It's way too early for me but someone forgot to tell my little darlings...like...everyday for the last 8 years...   PS.  Shortly after taking this photo I walked into a chair and stepped on the cat.  Did I mention it was early?
Blueberry Breakfast Smoothie


  • 2 cups frozen organic blueberries
  • 1-2 ripe organic bananas (the more ripe, the sweeter and therefore you won't need additional sweeteners)
  • 1 handful of organic spinach (sneak this in if you think anyone is looking - once it's blended, they'll never know...ha ha ha!)
  • 3 TBSP organic plain or vanilla yogurt
  • 1/4 cup water 
  1. Throw everything in your blender, and blend until smooth.
  2. Enjoy!


xo

Jen


Tuesday, September 18, 2012

Banana Oat Muffins

Sun-shiny muffin!  Yum!!
When I was pregnant with my first son, I bought something like 100 books....because I was a little excited.  Oh.  And a little crazy, too.  What?  You know - baby brain!  That's a 'thing', right?  Right? RIGHT?? Any-who, of the 100 books, I only found 2 to be remotely useful and one was the "Hospital for Sick Children's Better Baby Food" book.  And although both my boys no longer need all the purees and can successfully eat their "solids", I often refer to this book for some great recipes the whole family can still enjoy.  These muffins are one that I make and are both simple and tasty!  They can easily serve triple duty - as breakfast, as a great lunch-box addition or as a yummy after school snack!

Banana Oat Muffins

  • 1 cup All purpose Flour (I use organic unbleached)
  • 1/2 cup Whole Wheat Flour 
  • 1/2 cup Rolled Oats
  • 1 tsp Baking Powder
  • 1/2 tsp Baking Soda
  • 1/2 tsp Ground Cinnamon
  • 3/4 cup Buttermilk*
  • 1/4 cup Vegetable Oil (I use Coconut Oil)
  • 1 fresh Egg
  • 1/3 cup liquid Honey
  • 1 medium banana, mashed
  • 1/3 cup chocolate chips (this isn't in the original recipe but it "encourages" my youngest to eat these muffins...sigh)
*if you don't have buttermilk on hand, add 1.5 tsp of white vinegar to a measuring cup and add enough milk to measure 3/4 cup, let stand 5 minutes
  1. Preheat oven to 400 degrees F
  2. Lightly grease or add paper liners to a 12 cup muffin tin
  3. Combine the flours, rolled oats, baking powder, baking soda and cinnamon in a large bowl
  4. In a separate bowl, combine buttermilk, oil, egg, honey and banana
  5. Add dry ingredients to wet and stir until just moistened
  6. Stir in chocolate chips if using
  7. Fill each muffin cup with enough batter to fill about 3/4 full
  8. Bake for 18 min or until firm to the touch

Enjoy!

Oh.  As for the other 98 baby books, my doctor told me that I wasted my money and that women were having babies at the sides of fields for thousands of years without books and were able to immediately go back to work...in the field...so I immediately wondered what women, in what field and how can I send them my books?....and then I asked to be referred to an OB/GYN.  The End.

xo

Jen

Thursday, September 13, 2012

Turkey Breast for Best Lunch Box Sammy (Sandwich)


Now that school is back in and the nights are getting a bit cooler, we are back to roasting turkey or chicken for Sunday dinner.  This isn't exactly inspired by some childhood memory or tradition, but as a means to get a leg up on school lunches.  My least fussy eater, oddly enough, is very particular about his school "sammies".  He likes bacon (who doesn't, really) and "real turkey or chicken meat" (his words, not mine although I find it amusing that he puts it like this).  I have spent many dollars at the deli counter that I may have well just tossed in the garbage to save everyone the time and effort.  Apparently the taste and texture just doesn't appeal to him, and if the truth be told, I prefer the "real stuff" too.

So in my effort to be efficient in time and money spent, I began roasting enough delicious turkey or chicken on Sunday evenings to provide us with a hearty family dinner and yummy sandwich meat for the back-to-the-grind Monday and Tuesday lunches.  It's great because the kids love the taste, and I love that I know exactly what they're eating.  No mystery cuts, fillers or added preservatives here.

As an added bonus (if you are really wanting to stretch out your dollars - and who wouldn't?), you end up with some bones and bits of meat to make a quick turkey or chicken stock.  I have a great recipe for stock I will share in a later post, so stay tuned.  ;)


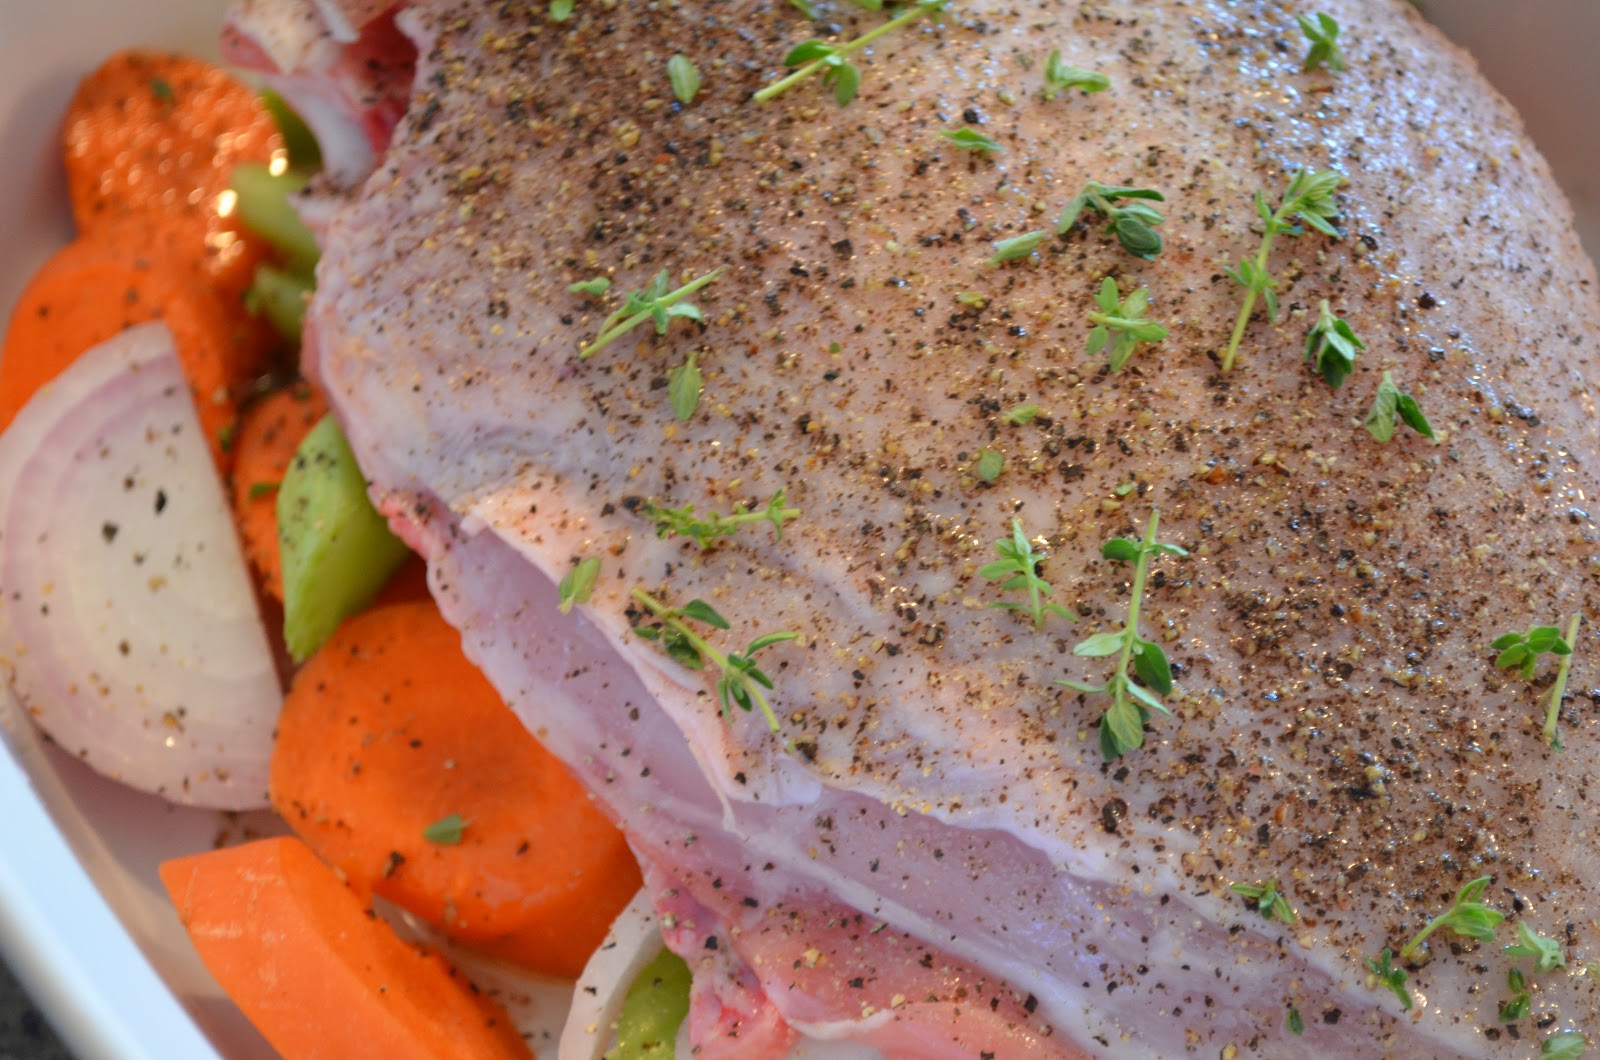
Oven Roasted Turkey Breast
  • Turkey Breast, Skin On, Bone In
  • Olive Oil
  • Sea Salt
  • Fresh Ground Black Pepper
  • 2 - 3 Carrots, washed, unpeeled and cut into 1" chunks (approx)
  • 2 - 3 Ribs Celery, washed and cut into 1 " chunks
  • 1 - 2 Onions, Skins removed, sliced in half and then into 1" slices
  • Fresh Thyme
  1. Preheat oven to 450 degrees F
  2. Add Carrot, Celery and Onion slices to a roasting pan
  3. Drizzle a little olive oil over the vegetables
  4. Add Turkey Breast on top of vegetables
  5. Drizzle Breast with Olive Oil
  6. Add a few sprinkles of Sea Salt, Fresh Pepper, and fresh Thyme
  7. Place in oven, uncovered and turn temperature down to 400 degrees F
  8. Let cook approx 20 min per pound +  extra 20 min, until meat thermometer reads 180 degrees F (Please note that I am super cautious about cooking any kind of poultry so I always use a meat thermometer inserted into the thickest part of the meat to test the doneness)
  9. Remove from oven and let stand for 15 minutes
  10. Enjoy!
xo

Jen

Tuesday, September 4, 2012

Nut free Granola Bar

Ho Hum...

The house is super quiet.  Not really sure what happened!  One minute we are hustling and bustling from one summer activity to another, packing picnic lunches, going from pajamas to bathing suits and right back into pajamas without ever looking at the T-shirt drawer, to me sitting alone in my kitchen on my 3rd cup of coffee, waiting for my 2nd load of laundry to finish and counting down the minutes to when I can go pick up my children and find out how their day was.  For me, the first day of school is a brutal one.  I am so happy that they are excited and I can't wait for them to learn and grow throughout each school year, but after a summer full of constant hugs and "mommy"'s, I can't help but miss them.

Of course we are back into packing lunches and my challenge this year will be how I can replace our common lunch box go-to's with tasty, healthier versions of my kids' favourites.  I decided to start with the granola bar.


'Nut free' Banana, Seed and Honey Granola Bar

  • 2 cups Organic Rolled Oats
  • 1/2 cup Organic Coconut Palm Sugar
  • 1/4 cup Ground Flax Seed
  • 1/3 cup Organic Unsweetened Shredded Coconut
  • 1 cup Organic Whole Wheat Flour
  • 1 tsp Cinnamon
  • 1/2 cup Organic raisins (or dried cranberries)
  • 1/4 cup Chocolate Chips (or Carob)
  • 1/4 cup Unsalted, Raw Pumpkin Seeds, hulled
  • 1/4 cup, Unsalted, Raw Sunflower Seeds, hulled
  • 3/4 tsp Sea Salt
  • 1 Egg, beaten
  • 1/2 cup Raw Honey
  • 1/3 cup Melted Butter
  • 1 Ripe Banana, mashed
  • 2 tsp Real Vanilla Extract
  1. Preheat oven to 350 degree F
  2. In a large bowl, combine oats, palm sugar, ground flax, coconut, flour, cinnamon, raisins, chocolate chips, pumpkin seeds, sunflower seeds and salt
  3. In a separate bowl, combine egg, honey, butter, banana and vanilla
  4. Add wet mixture to dry and mix until well combined
  5. Lightly grease a 9" x 13" cake pan
  6. Add granola mixture into greased pan and press flat
  7. Bake for approx 25 min (bars will still be slightly chewy)
  8. Remove from oven and cool in pan for 5 min
  9. While still warm, cut into desired size and let stand until completely cool
  10. Store in air tight container
  11. Enjoy!

 
 Wishing everyone a safe and enjoyable first day back to class!
 
xo
 
Jen

Saturday, September 1, 2012

Zucchini and Potato Pancakes


The last time my Aunt and Uncle were over for a visit, my Uncle was having a walk down memory lane about the amazing potato pancakes my Grandmother used to make.  They were absolutely to die for!  Crispy and golden on the outside, warm and tender on the inside.  Served with a dollop of sour cream and sprinkled with fresh dill....I actually preferred them to her regular pancakes, and she could have won an award for those, so these were good, if you get my drift.  

As zucchini are plentiful this time of year, I love adding some shredded zucchini into the mix as it helps me forget that there are probably healthier ways to enjoy both zucchinis and potatoes in life but hey, who's counting?  I actually love zucchini and am constantly on the look-out for new ways to prepare it.

The key to getting these pancakes nice and crispy is to squeeze out most of the moisture.  When I started making these, the centers were mushy and I just couldn't seem to get my recipe right.  After a few failed attempts, I fessed up to my Grandmother that I was "adapting" her recipe and adding zucchini but clearly, I'm an idiot for trying to mess with perfection, and I was surely being punished.  She just laughed, said it was good to try new things and told me to squeeze 'em in a clean dish towel.  What?  That's it?  Oh.  Thanks.  The next thing I did was replace some of the flour with bread crumbs and that worked so I went with it.  I will admit that I do vary my recipe a bit, sometimes adding shredded onion into the batter and topping with dill (very similar to Grandma's) and sometimes, I add whatever bit of sharp tasting cheese I have left in the fridge, omit the onions in the batter, and top with sliced green onions.  This way my boys seem to like them better.  I think they are equally good variations.

Give 'em a whirl!
So these are good in a pancake?  Zu-cchini-me!  lol!  (Ryan didn't get my joke - "zu-cchini-me" - "You kidding me"....no?  Oh.  Sorry.)
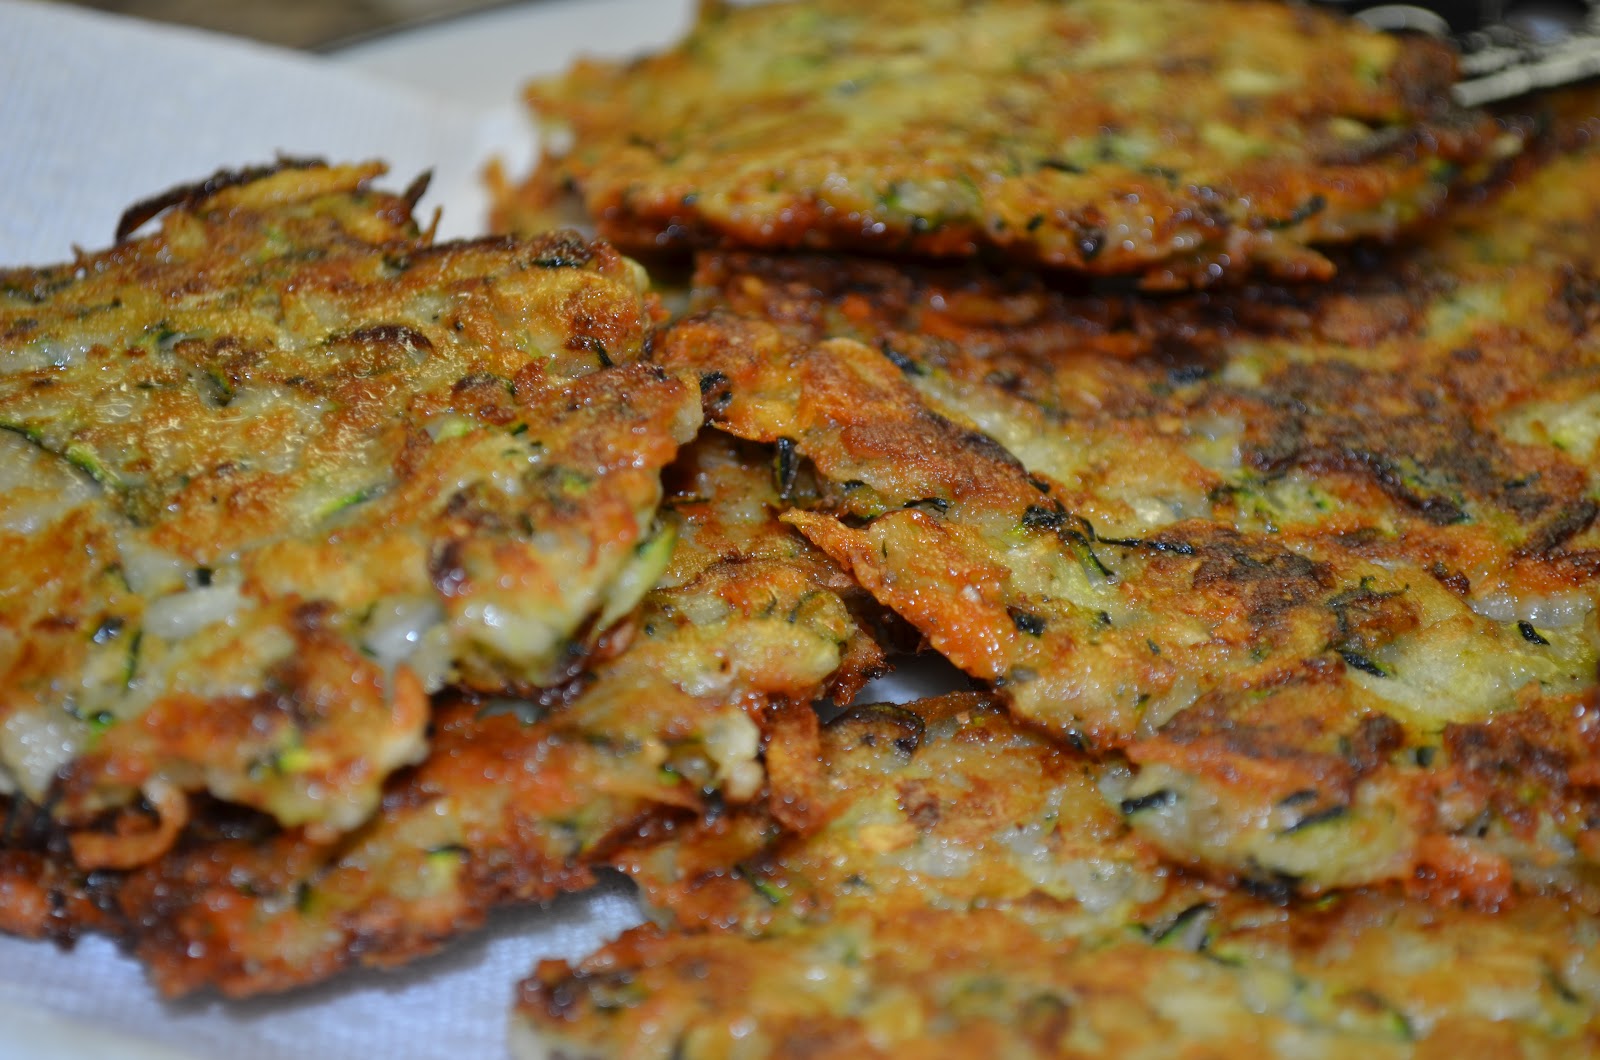
Looks good, right?  Right!
Shredded potato with the skins!
Loooovvveee my Vitamix Dry blade!  Made easy work of fresh bread crumbs!!


Oh. Yeah.
(Cat-call whistle).  lol.  
Mmmm....
Zucchini and Potato Pancakes

  • 3 Med Zucchini, shredded and water squeezed out (I use a couple of clean dish towels)
  • 5 Large Potatoes, shredded and water squeezed out
  • 1/2 Cup fresh bread crumbs
  • 1 Cup Organic Unbleached Flour
  • 2 Large Eggs
  • 1 Cup Shredded Asiago cheese
  • Salt and Pepper
  • Oil for frying
  1. Combine all ingredients together in large bowl and mix well
  2. Coat bottom of pan with a thin layer of oil and heat over Med-High Heat
  3. Drop spoonfuls of batter into hot pan and press gently with back of spatula or spoon to flatten so the "pancake" has an even thickness all over
  4. Cook until browned and flip (the pancake, not you - that would be dangerous in the kitchen)
  5. Continue cooking until the pancake is golden brown on both sides
  6. Place on a paper towel to absorb any excess oil from 
  7. Serve with Sour Cream or Plain Yogurt and Sliced Green Onion
  8. Enjoy!
YUMMY!!
xo

Jen

Monday, August 20, 2012

Wheat Bran loaf w/ Honey, honey!


If you've never baked bread from scratch then you have sadly missed out.  Sorry to be so dramatic but hey, that's me.  Plus, I just really, really, really want you to experience all the wonders resulting from this beautiful craft.  The smell of yeast, the texture of the dough as it comes together, the little puffy mounds that begin to rise under your tea towel reminding you a little of Frankenstein - "it's alive!", you'll want to shout.  And finally, the unbelievable aroma filling your home as your loaves bake and the sound of the crust when you gently tap the finished product.  Wait - the taste!  How can I forget the taste?  It's just so much better than the stuff you buy in the bag at the grocery!  Now I am no bread "artisan" but after many years of kneading, I can work my way around a loaf or two.  I will say that bread baking requires a little practice but as with most things, the more you do it the better you get at it plus the kneading part is a great workout for your arm muscles and who couldn't use an extra workout here and there?  Especially if you're eating all of that bread!  Ha ha!

This is quick-rise yeast.  Looks normal enough...
Hey now!  What's going on?
A little luke-warm water really woke those babies up!
Whole wheat flour...so soft and flour-y?  I'm so descriptive, I know.
Wheat bran!
When I'm in the mood I do everything by hand but today I'm not in the mood so I decided to start with my trusty mixer.  It happens.
Pre-me-kneading.
Here we go.  Almost looks like a smile...
Dough is looking smooth and feels great!
Into a large, greased bowl to rise, baby, rise!
...1 hour later, after it's doubled in size you ....flatten it?  Yup!
And one becomes two...
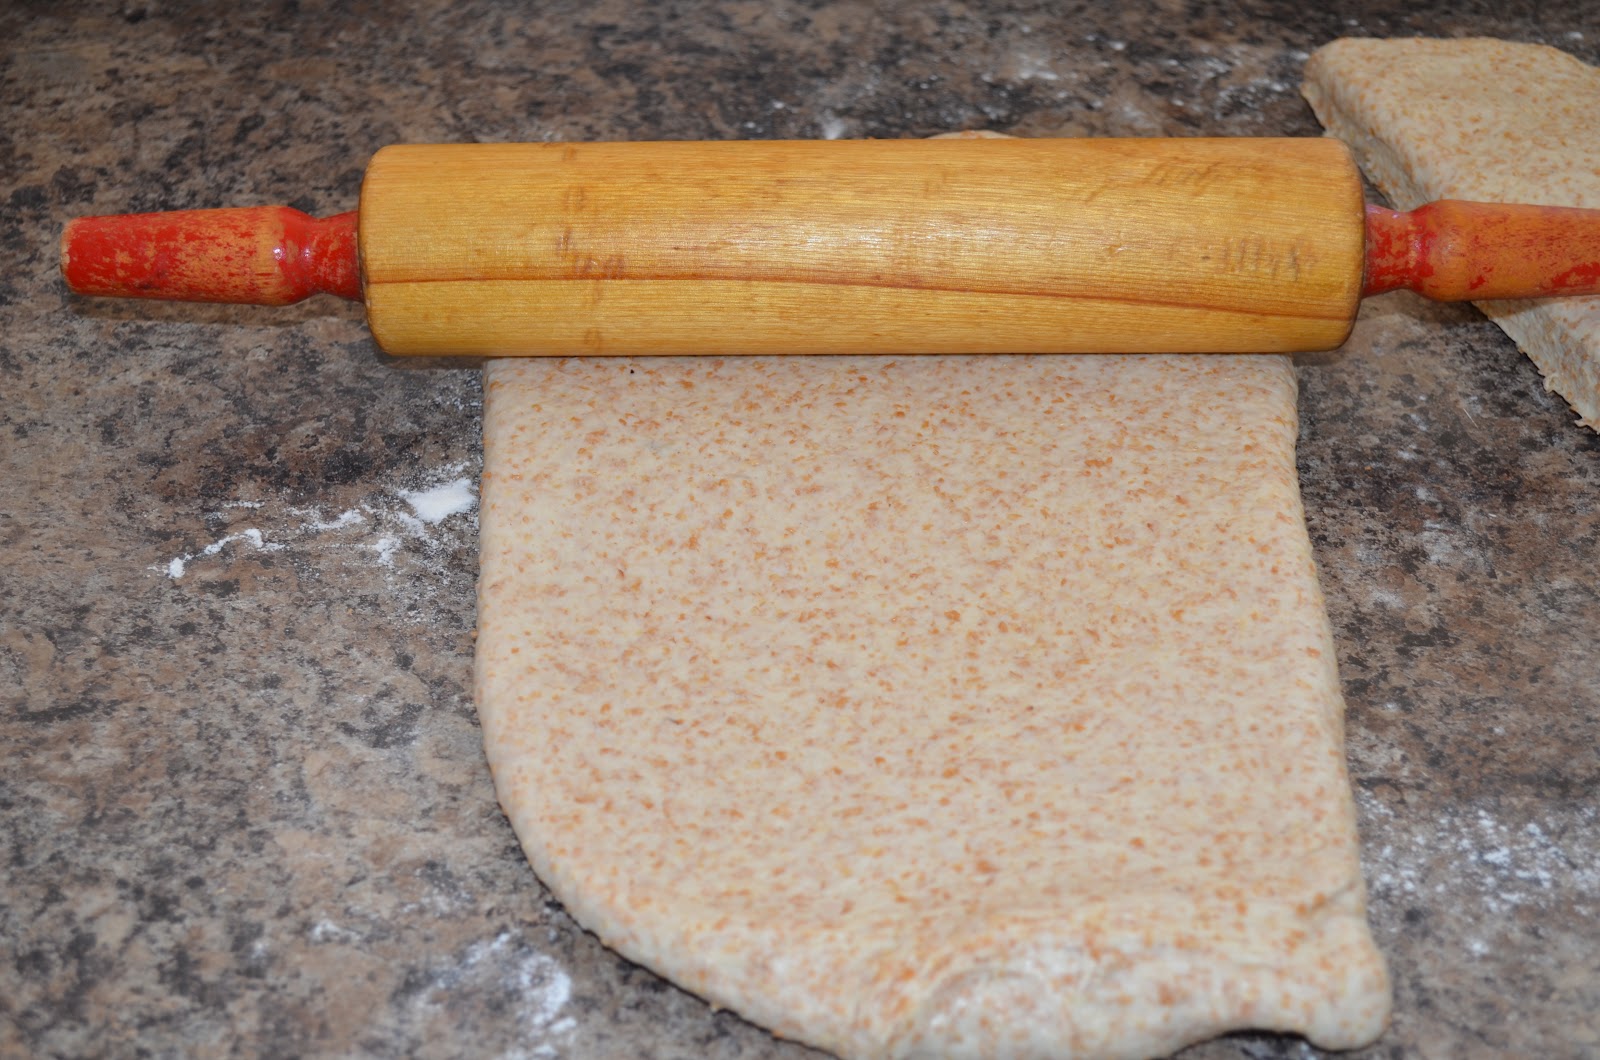
Out comes my grandmother's rolling pin...not because it's a particularly good one but I love using it knowing that she used it to make all of my childhood favourites.
Rolling rectangles, batman!
Looks like a jelly roll!
Nip and tuck...it's not just a TV show, ya know!
Into a greased loaf pan for rise number 2.
IT'S ALIVE!  (See, I told ya you'd want to shout it)
After the second rise...
Looking like they want to jump in the oven.
Can you believe it?
Did I make that?
Two for the price of one!!  Oh yeah!
Now for the real test....sooooo good!
This is how we topped bread at my grandmother's house.  Fresh field tomatoes from the garden with salt, pepper and green onion!  Delicious!

Wheat Bran Loaf w/ Honey

  • 2 1/4 tsp Quick Rise Yeast
  • 2 1/2 cups luke-warm Water
  • 3 cups Organic Whole Wheat Flour
  • 2 - 2 1/2 cups Unbleached Bread Flour
  • 2 cups Organic Wheat Bran
  • 1/4 cup Honey
  • 1 Tbsp Olive Oil
  • 11/2 tsp salt
  • 2 Tbsp Milk
  1. Dissolve yeast in 1/2 cup of luke warm water and let stand for 4 - 5 minutes, until bubbles begin to rise
  2. In a large bowl, combine the whole-wheat flour, 1 cup of bread flour, bran and salt
  3. Add remaining 2 cups of water, yeast mixture, honey and oil, and stir adding enough of the remaining bread flour to form a soft dough that's not too sticky and holds it's shape
  4. Turn dough out onto a lightly floured surface and begin kneading by hand adding more flour as necessary until dough is smooth and elastic, about 10 minutes
  5. Place ball of dough into a clean, greased bowl and turn to grease the whole ball
  6. Cover with a clean tea-towel and place in a warm, draft-free place to rise until doubled in size, about 50-60 minutes
  7. Once risen, turn the dough out onto a lightly floured surface and press flat
  8. Cut dough into two equal halves
  9. Roll out each half into a rectangle, using a rolling pin
  10. Roll each rectangle jelly-roll style, stretch and fold under ends, and pinch seams
  11. Place each loaf into a greased loaf pan, seam-side down
  12. Cover with a tea towel and place in a warm, draft-free place to rise again until doubled in size, about 50-60 minutes
  13. Preheat oven to 375 degrees F
  14. Using hands or pastry brush, glaze each loaf with 1 Tbsp milk 
  15. Bake approx 35 min until loaves are well browned and sound hollow when tapped on the bottom
  16. Cool on wire rack

I am certain you need to knead!  Have fun and enjoy!

xo

Jen